monster bash

IMG_5095

My nephew turned one last month and I was so happy to get to help out with the party. Themed parties are certainly the way to go if you ask me because a theme can give you direction for everything. Once you have chosen a theme you can more easily make decisions about the location, the decorations, and the menu. My nephew, M, is too young to have any favorite TV shows, movies, or toys so my sister just decided to have a monster-themed party for her little one-year-old monster.


We really went big with the monster theme; go big or go home, right? The best part of this theme is that all you have to do is stick eyes on everything and just call it a monster. Here are some photos from the party:

IMG_0290 

Olive-eyed monster sandwiches, monster fingernails, monster fingers, and Kool-Aid with eyes, this party was packed with monster food.

IMG_0293

Monsters, monsters, monsters. This party was crawling with them. I hope you can be inspired to throw your own themed party!

what’s cookin’?

One thing that I really do not enjoy is grocery shopping. I could vent on this subject for days, but instead I am going to share one thing that makes shopping for groceries just a little bit easier: having a menu. I find that when I have a weekly menu planned out for my household, I am less likely to forget to buy an important ingredient and I am less likely to have food that goes bad before it gets used. Usually on Mondays I will sit down with my recipe book and decide what meals we will be having for the week. From this I am able to make a grocery list and do a shopping trip. Of course I do not stick to the menu like it’s written in stone… Sometimes I just don’t feel like cooking or maybe some better offer comes along, but I still find the menu to be a great tool for avoiding the “what do you want for dinner tonight?” conversation as well as for staying within our monthly grocery budget.

A fun and decorative way to make a menu each week is to have a menu board. Or in my case, a menu wall. This project was simple and inexpensive to make and it is a lot of fun to use!


First I went shopping! I found all seven picture frames at Goodwill for under $10. They are different shapes and sizes and I opted for worn-looking black and wooden frames. You could easily choose more uniform frames, but it might be difficult to find seven frames that are exactly the same at a second-hand store. It is important to get frames that have removable glass. There are some decorative frames that are made without access to the glass which will make painting them difficult.

I removed the glass and spray painted them with chalkboard paint. I bought my paint, but I have seen tutorials for making your own chalkboard paint that might be worth checking out.

After the paint was dry, I used acrylic paint markers to write the days of the week. This was my own handwriting, but if there is a specific font that you prefer you can always use the chalk transfer method that I explained on my “home is wherever i’m with you” post.

Finally after putting the glass back into the frames, I did a lot of measuring and calculating to hang the frames on the wall in my dining room.


ladies night

Every Monday night I get together with my favorite gal pals that live here in the city. More often than not we keep it pretty low-key with just dinner and hanging out. In the summer we like to be active outside either swimming, playing tennis, or just going for a walk. However, to kick off the cold weather here in naptown I decided that it would be fun hosting a warm and cozy comfort night with the girls. I kicked my husband out (sending him away with dinner, of course) and we spent the evening having fun doing all things girly.

I set up stations throughout the house for us to easily transition from one activity to the next. Our night included Chinese food, crafting, a chick flick, and lots of pampering. I find it hard to pick my favorite part of the night; it was nice to stop thinking about our jobs and just focus on spending quality time with each other and having fun.


I had dinner ready for when the gals arrived. What says comfort food better than Chinese? I made my own adaptation of bourbon chicken (I substitute wine for the bourbon, so am I still allowed to call it “bourbon chicken”?). This is a surprisingly easy meal to make with the chicken simply cooking in the crockpot all day. I just serve it over quinoa and top it with some green onion.

After dinner (and a whole lot of chatting) we got in our comfy clothes and did facials. We used an avocado clay mask that I found at the convenience store. We also used Mary Kay’s Satin Lips product.

Finally, it was craft time. I decided to teach the girls how to make the card display frame that I blogged about here. For their frames though, I went ahead and got some extra decorative accessories to make the frames look pretty. They both chose to put their initial on their frame along with some bows and ribbon. In the end, I decided that I am going to have to revisit my own card displaying frame and decorate it more like Beth and Jade’s. While they were working on their frames, I painted my own initial (the letter L) for a window project that I have in the works.


FullSizeRenderIMG_4859

Our drink of choice for the night was an adaptation of amaretto sour. I realized when I went to  make the drinks that I didn’t actually have the sour mix, so I just mixed the amaretto with apple juice instead. We decided to call it an amaretto apple. We all thought it was very tasty.

After crafting, we settled down under our blankets with a fire going. Of course we had some popcorn and chocolate chip cookies to snack on and we watched Twilight. During the movie we also did our nails because what is a girl’s night without manis and pedis?


the most wonderful time of the year

IMG_4954

I absolutely love everything Christmas. I like to embrace all things Christmas the day after Thanksgiving and not a moment before. It is a tradition in our family that the ladies go Black Friday shopping while the men go deer hunting then we all come together to put out the Christmas decorations in the afternoon (some family members enjoy this tradition a little more than others).


I dream of someday having decorations that look like something out of a magazine, but for now these are the humble decorations that I currently have. They are pretty simple and of course mostly handmade; what a great time of year for all different kinds of crafting!

IMG_4958

The Noel letters are simply cardboard letters that I bought from Hobby Lobby. I painted them with a red acrylic paint and stood them up in front of my fireplace.

IMG_4960

IMG_4963

You can find instructions for making this card displaying frame here.

IMG_4962

I like to think that I am good at gift-wrapping, but the truth is only every couple of presents end up looking good. This year I found a package of cute little bells at Hobby Lobby so I decided to try them on presents. They turned out pretty cute when paired with twine and my mom’s awesome handmade gift tags.

IMG_4959

I don’t know why, but I absolutely love dressing up my fridge like a snowman this time of year. This is just construction paper cut into the shapes that you see. It’s a seriously simple and easy way to make your kitchen festive!

IMG_4966

Pine cones are simple and cute and smell great! I put them everywhere this time of year.

IMG_4965

Some of my favorite Christmastime traditions are going to the Yuletide Celebration downtown, watching tons of Christmas movies (my favorites are Elf, It’s a Wonderful Life, A Christmas Story, and White Christmas), driving around to see everyone’s Christmas lights on display, and most of all getting to spend time with my family. What are some of your favorite Christmas traditions?

displaying cards

Displaying holiday and birthday cards can be difficult when you run out of room on your bookshelf and mantle or just when they won’t stand up on their own (like post cards). I have some family members who hand make all the cards that they give and of course these beautiful cards deserve to be displayed. The apartment where my husband and I lived in Bloomington had cabinets in the living room that were perfect for displaying cards and even pictures that we received. But when we moved we lost that convenient display method. My solution? A DIY project of course!

I originally made this frame display specifically for Christmas cards and I thought that it would be put away at the end of the season with all my other Christmas decor. I realized though that it is perfect for all cards and photos that we receive throughout the year and does not have to be holiday specific. However, I do like dressing it up with some poinsettia clip on flowers at Christmastime.


Like most of the projects that I do, this is a very simple, inexpensive, and useful one. It only requires an empty frame (any size and color you like), twine, a hot glue gun, and mini clothes pins.

I cut five pieces of twine to be the length of the frame. You can display the frame either landscape or portrait style, but whichever you choose the twine will need to be attached horizontally.

Making the twine tight, simply attach the ends to the back of the frame using hot glue. As this display gets used, the twine will stretch (as you can see was the case with mine) so it’s important to go ahead and make the strings tight now.

I also did not worry about making the twine go straight across the frame. This is a style preference and can certainly be done either way.

IMG_4793

I bought miniature clothes pins from a craft store to pin the cards on the twine. I like the natural look of the wood, but these could also be painted any color that you might like.


Here is what my frame looks like at Christmastime!

IMG_4961

home is wherever i’m with you

A little over a year ago my husband and I moved from our small college town in southern Indiana in favor of city life in Indianapolis. Matt and I met at Indiana University, got married in Bloomington, and lived there for the first two years of our marriage. While Indy was just moving back home for my husband, it has been a completely new experience for me having grown up in a very small town in southern Indiana. I’m not a fan of living in the city (yet), but I do not doubt that this is where the Lord has us right now and I am very grateful to not only be close to my in-laws, but to also be a part of a wonderful church here.

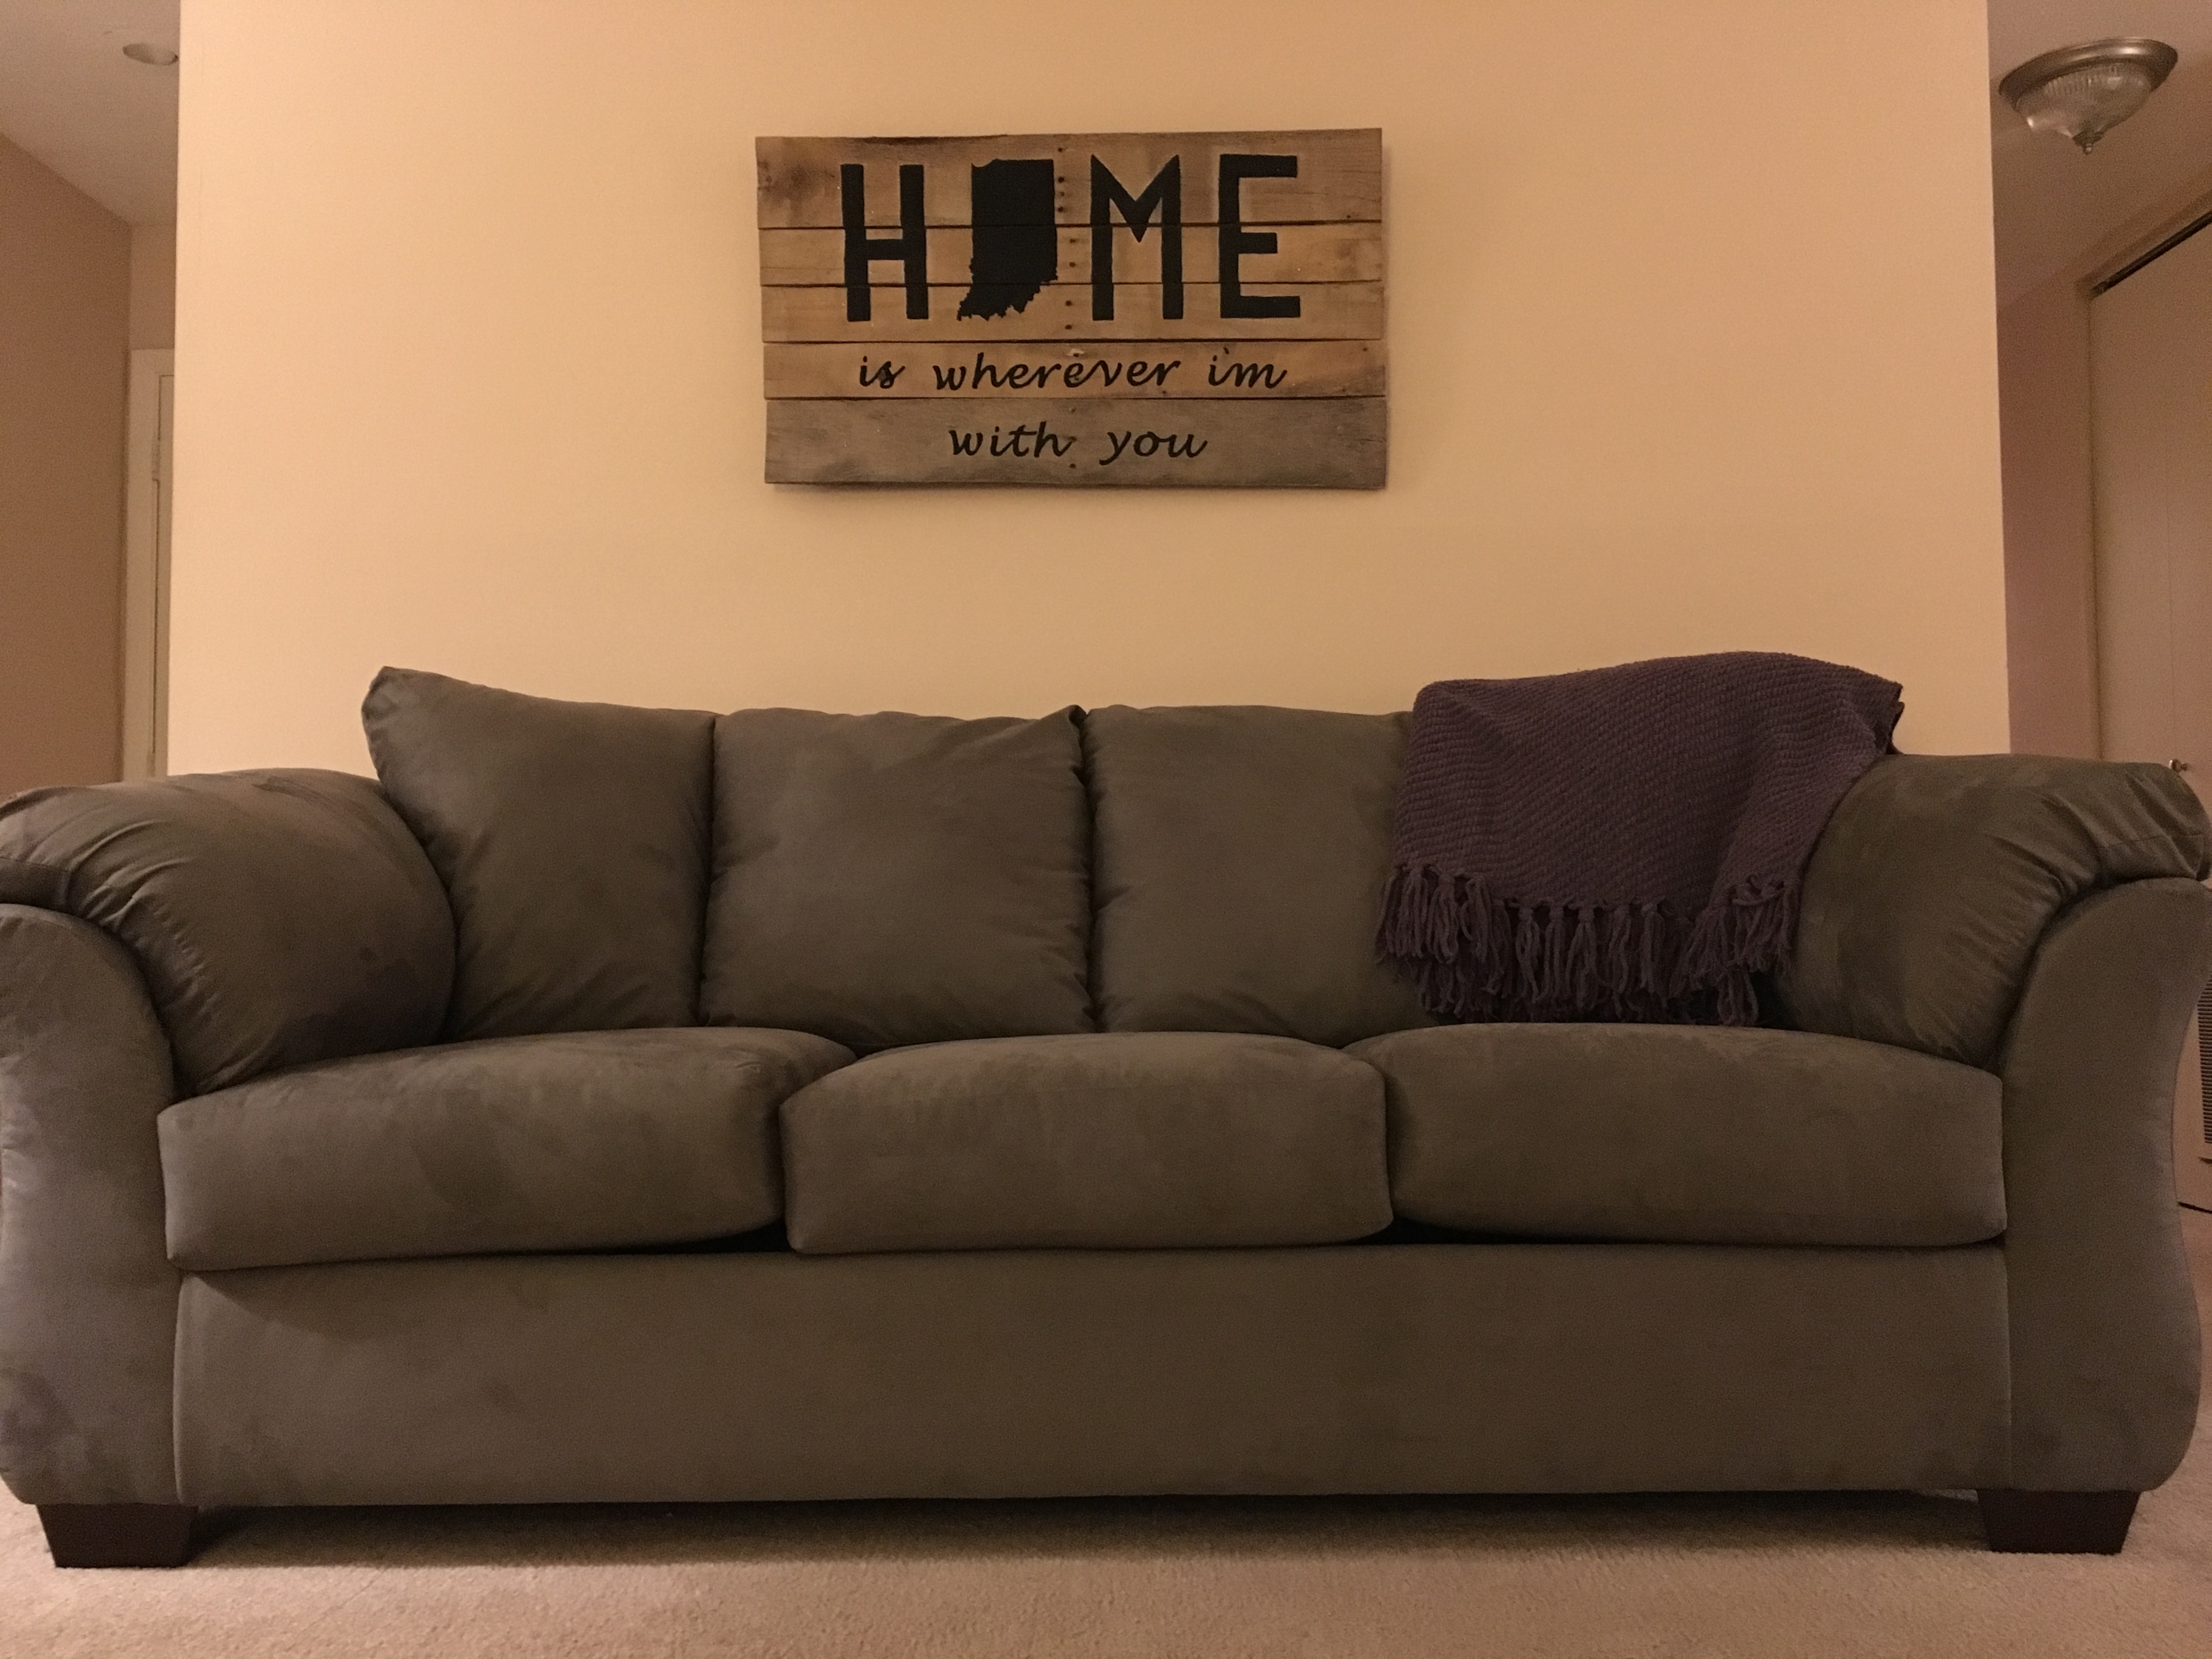
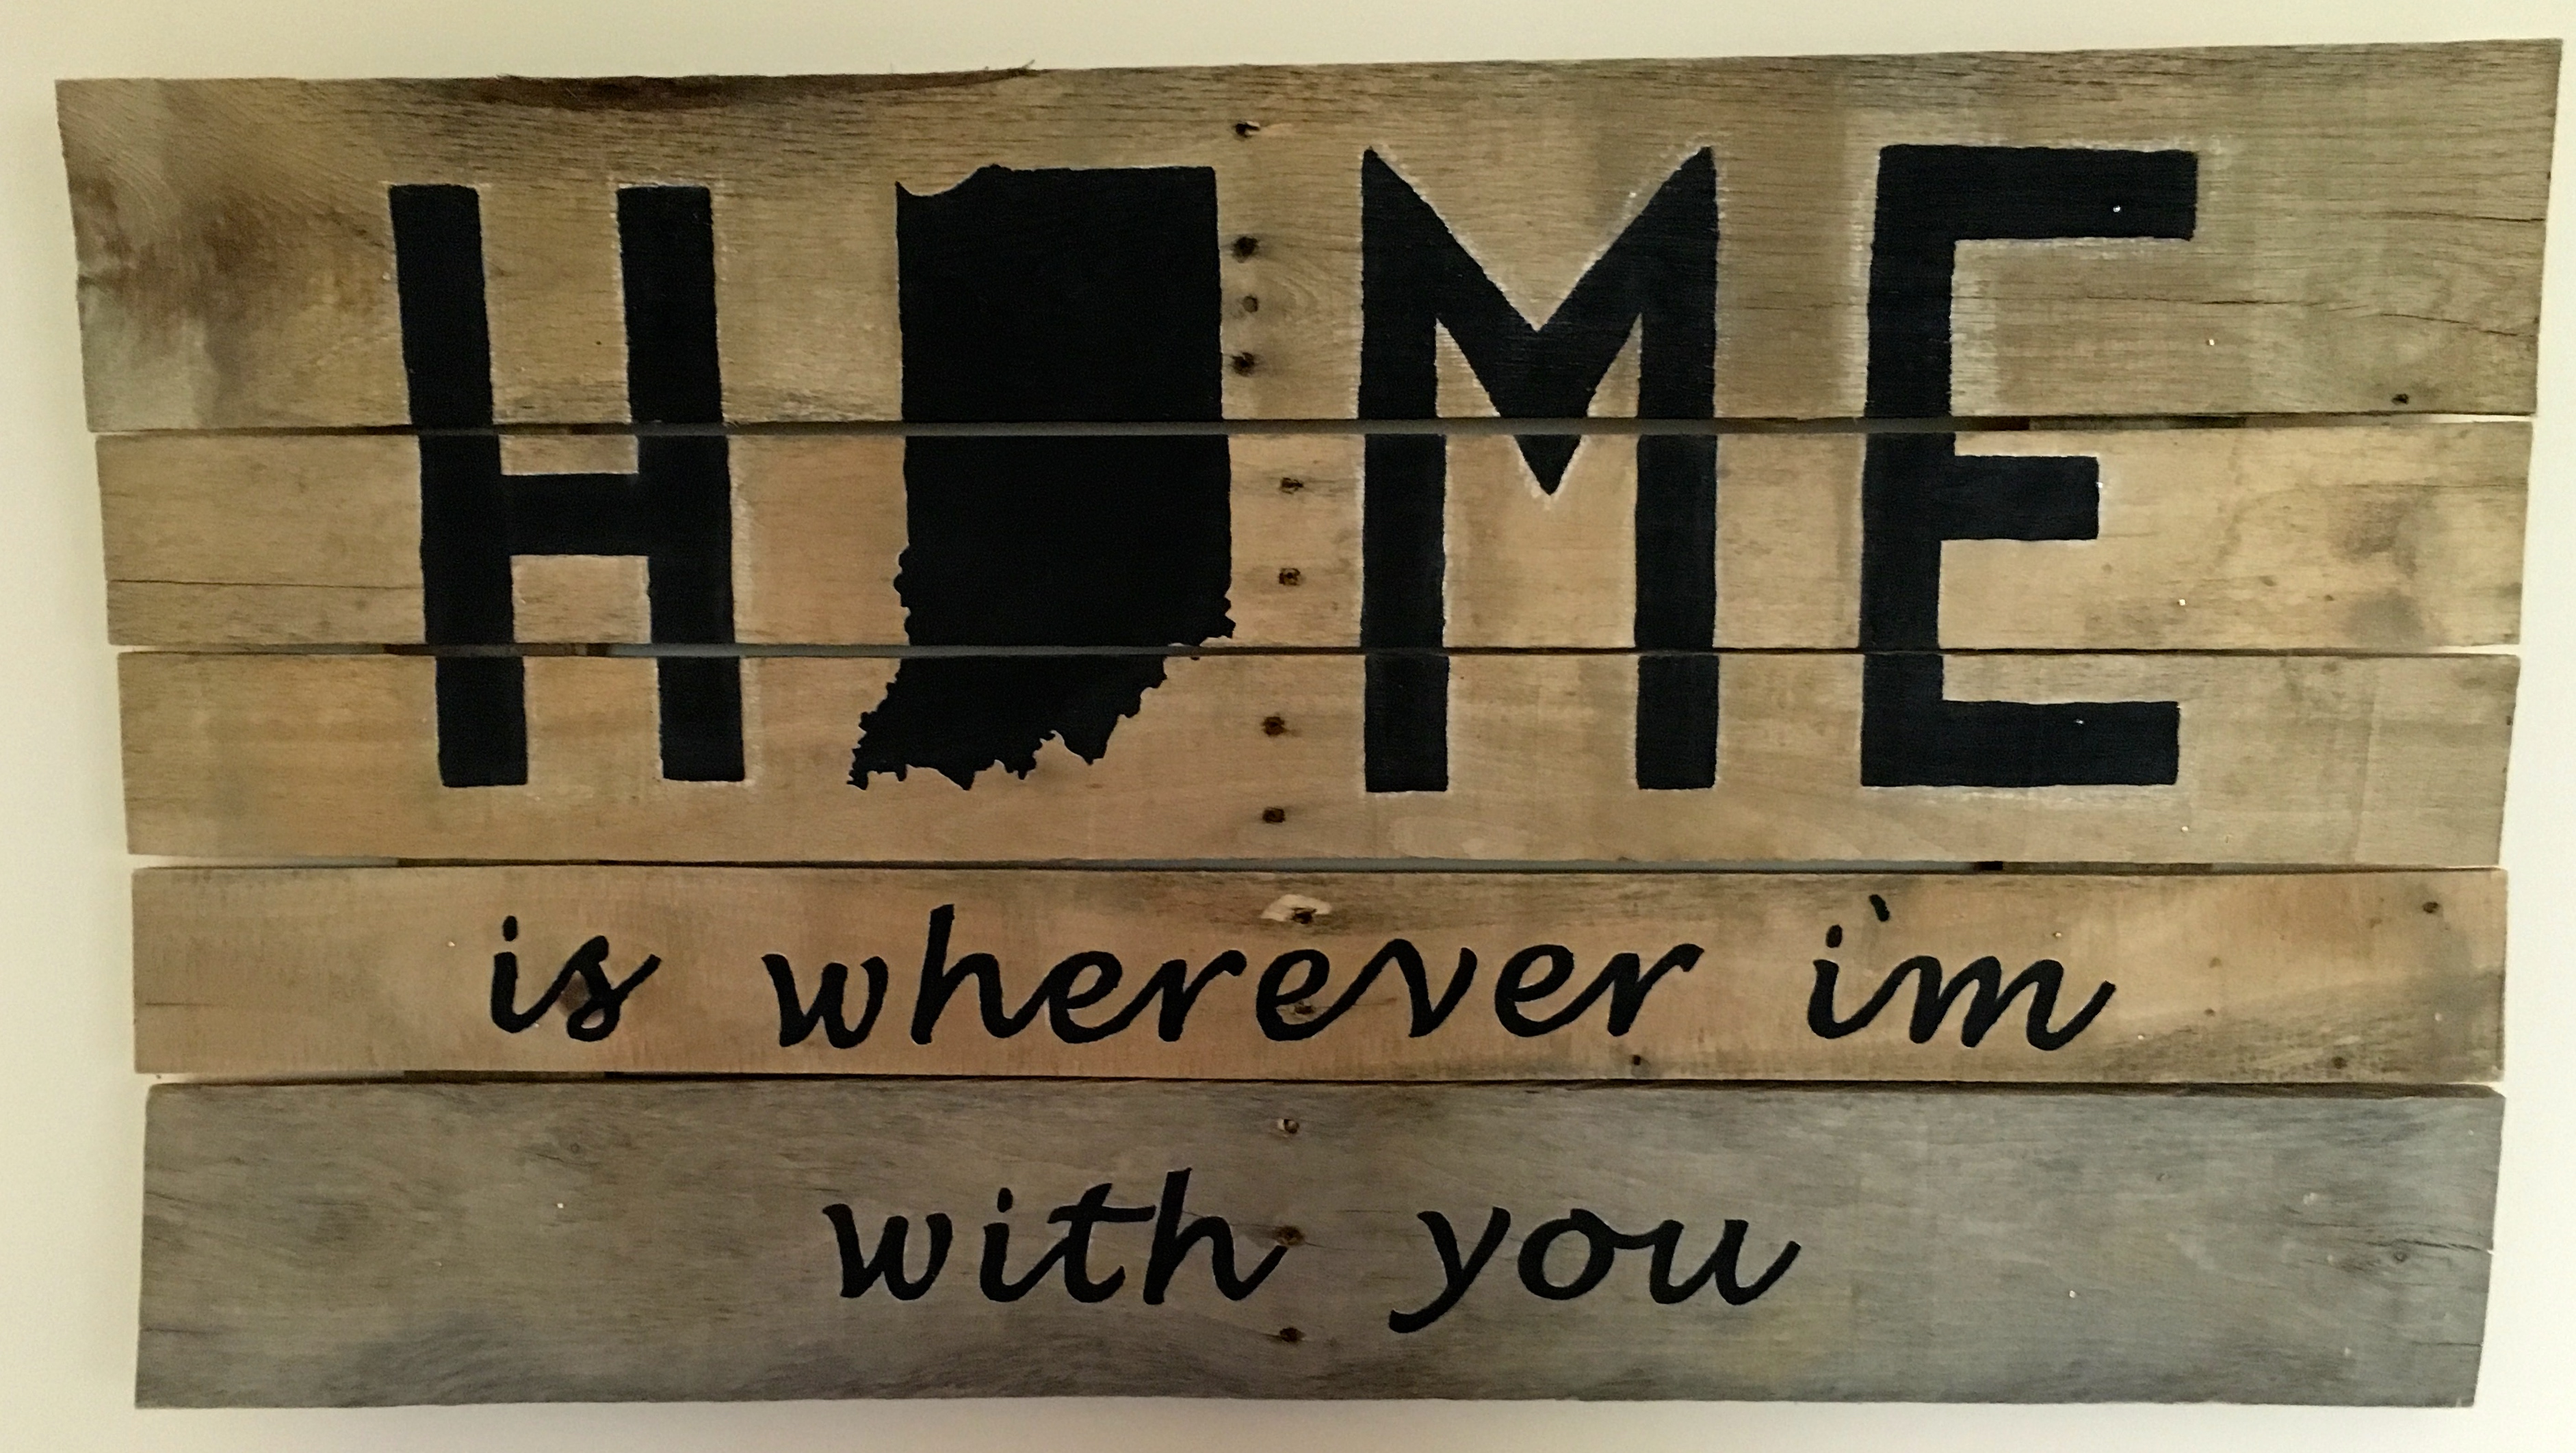
Moving gave us double the square footage that we had in Bloomington and I needed to figure out how to fill the walls and make this new place our home. A song that I absolutely love by Edward Sharpe and the Magnetic Zeros says “Home is wherever I’m with you” and I used this line to inspire the artwork that I made to hang above our couch in the living room.

Here is a little DIY project that I made. It didn’t take a whole lot of time to create this sign, but it did take a lot of effort because I do not own any power tools.


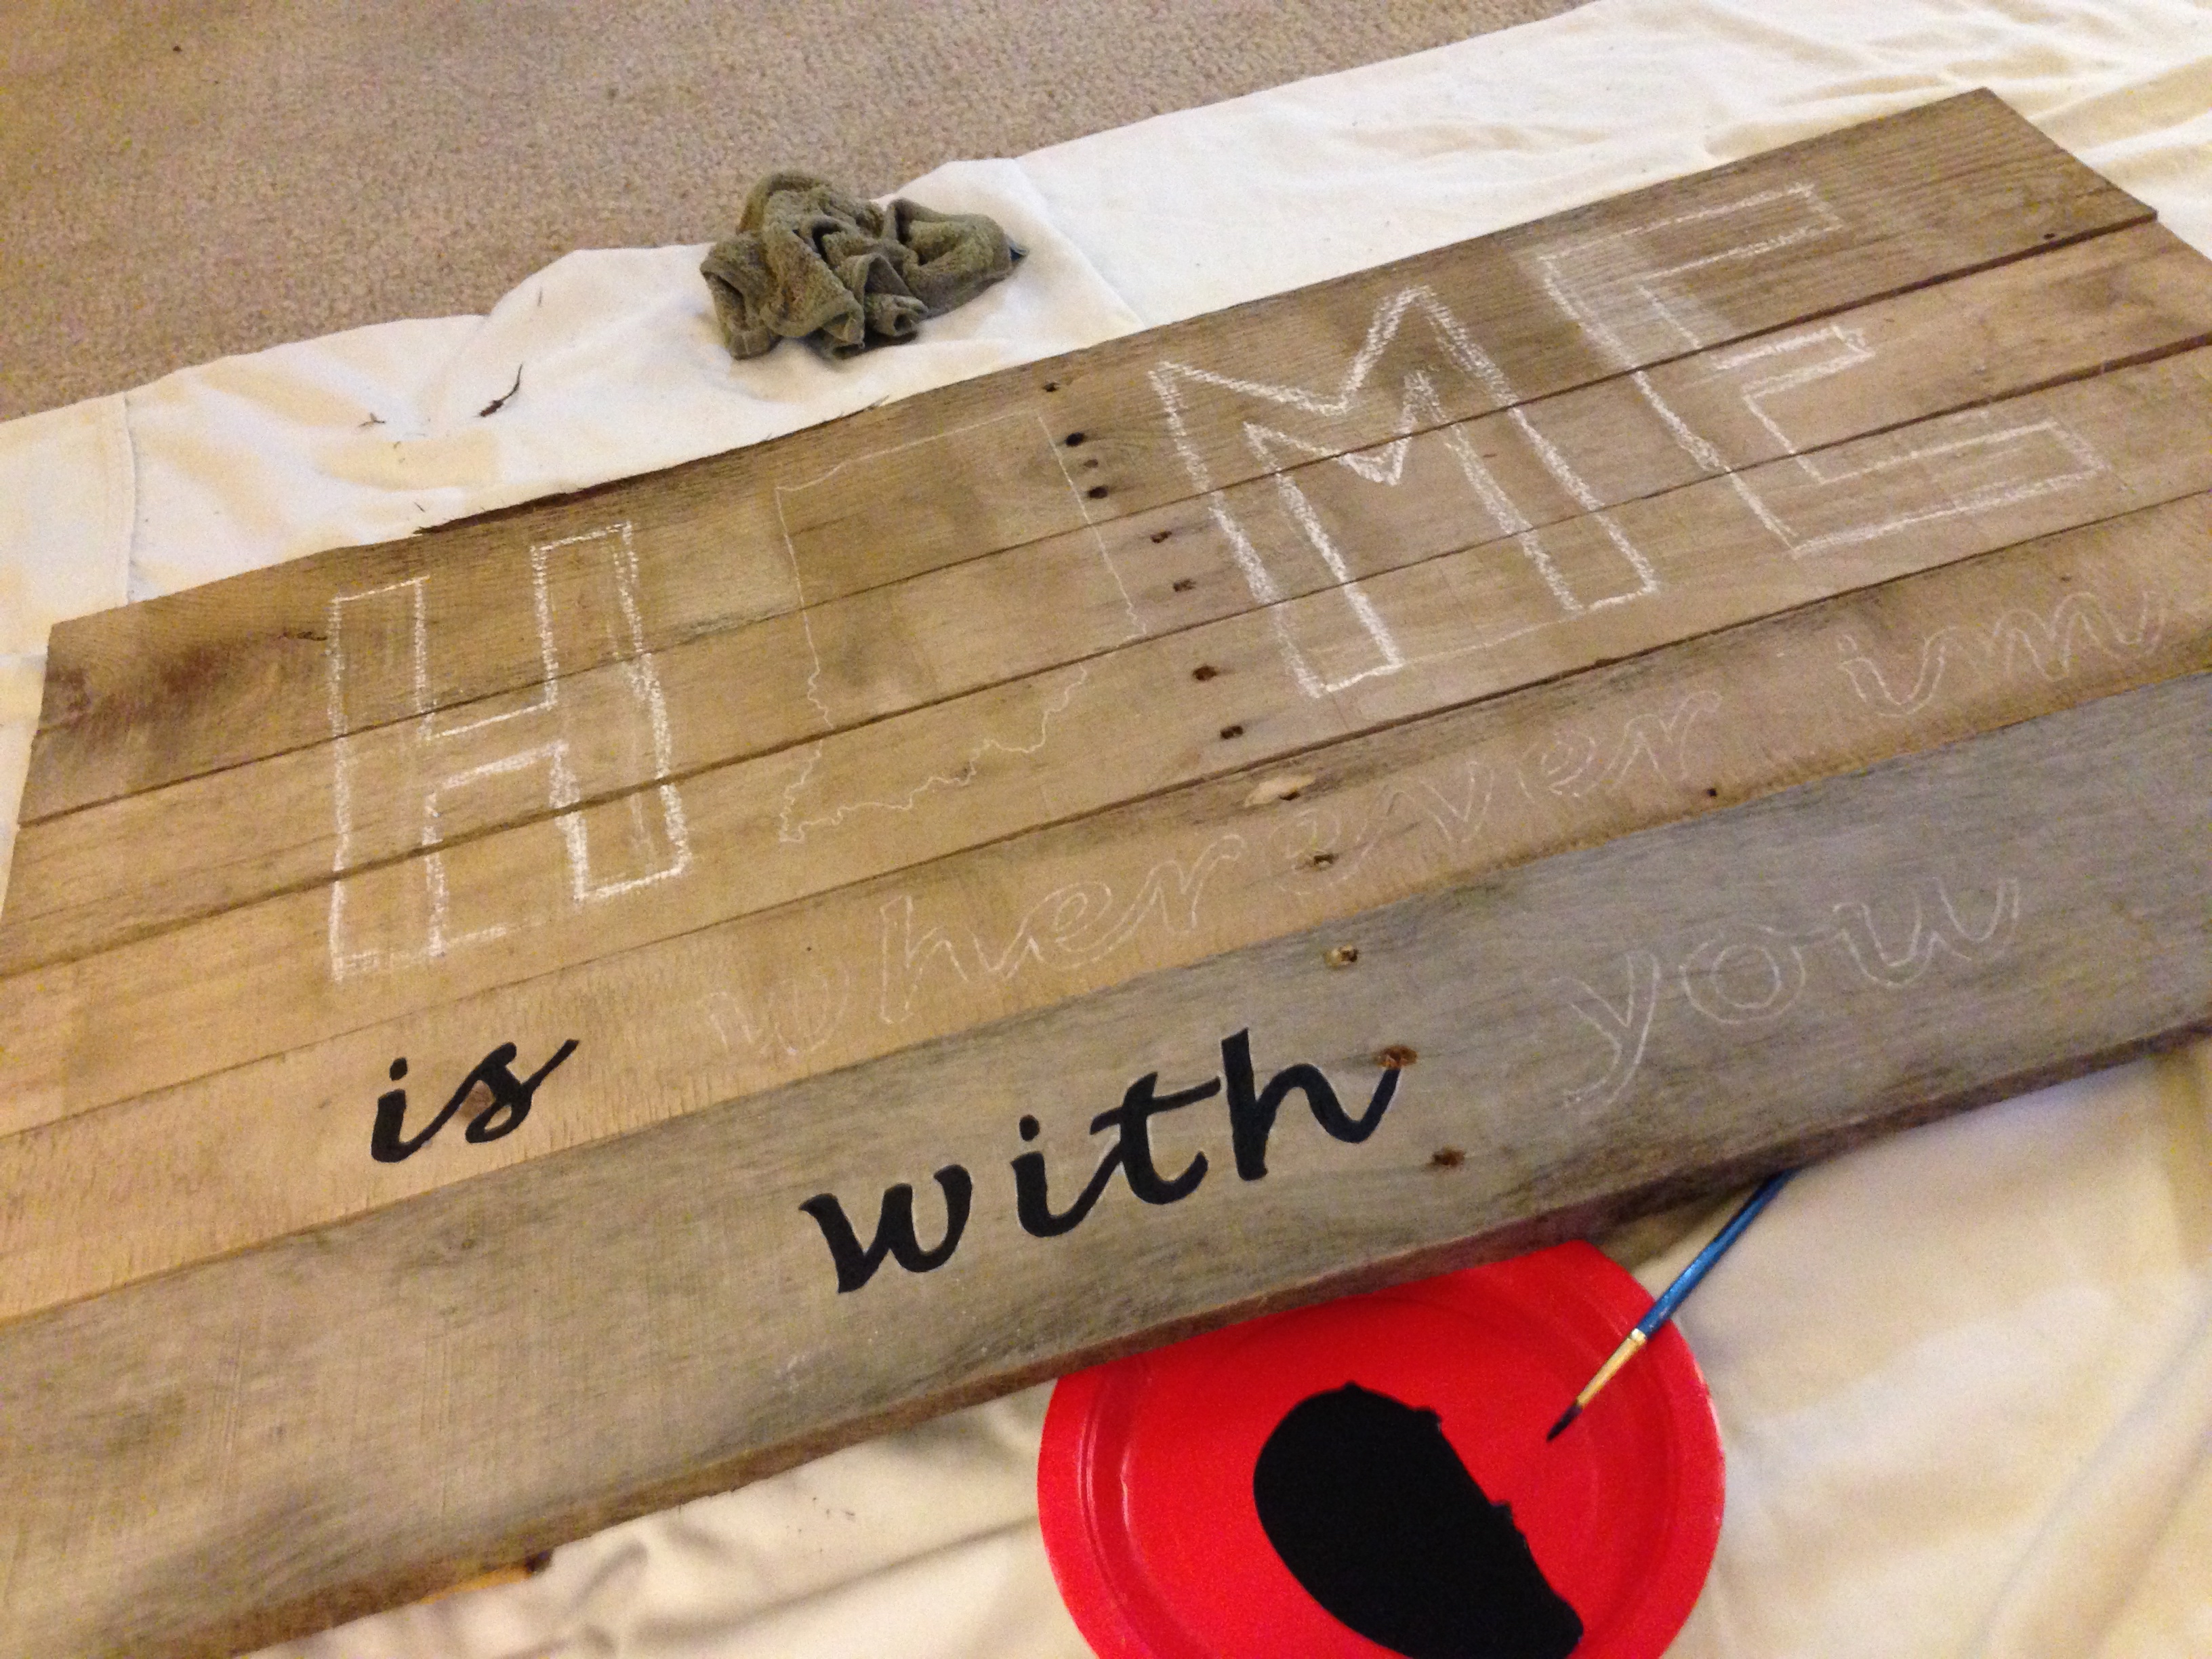
The first thing that I did was build the sign. Using reclaimed wood from an old pallet, I built my canvas by hand. This step can easily be skipped because wooden signs can be found in almost any craft store (my favorite is Hobby Lobby).

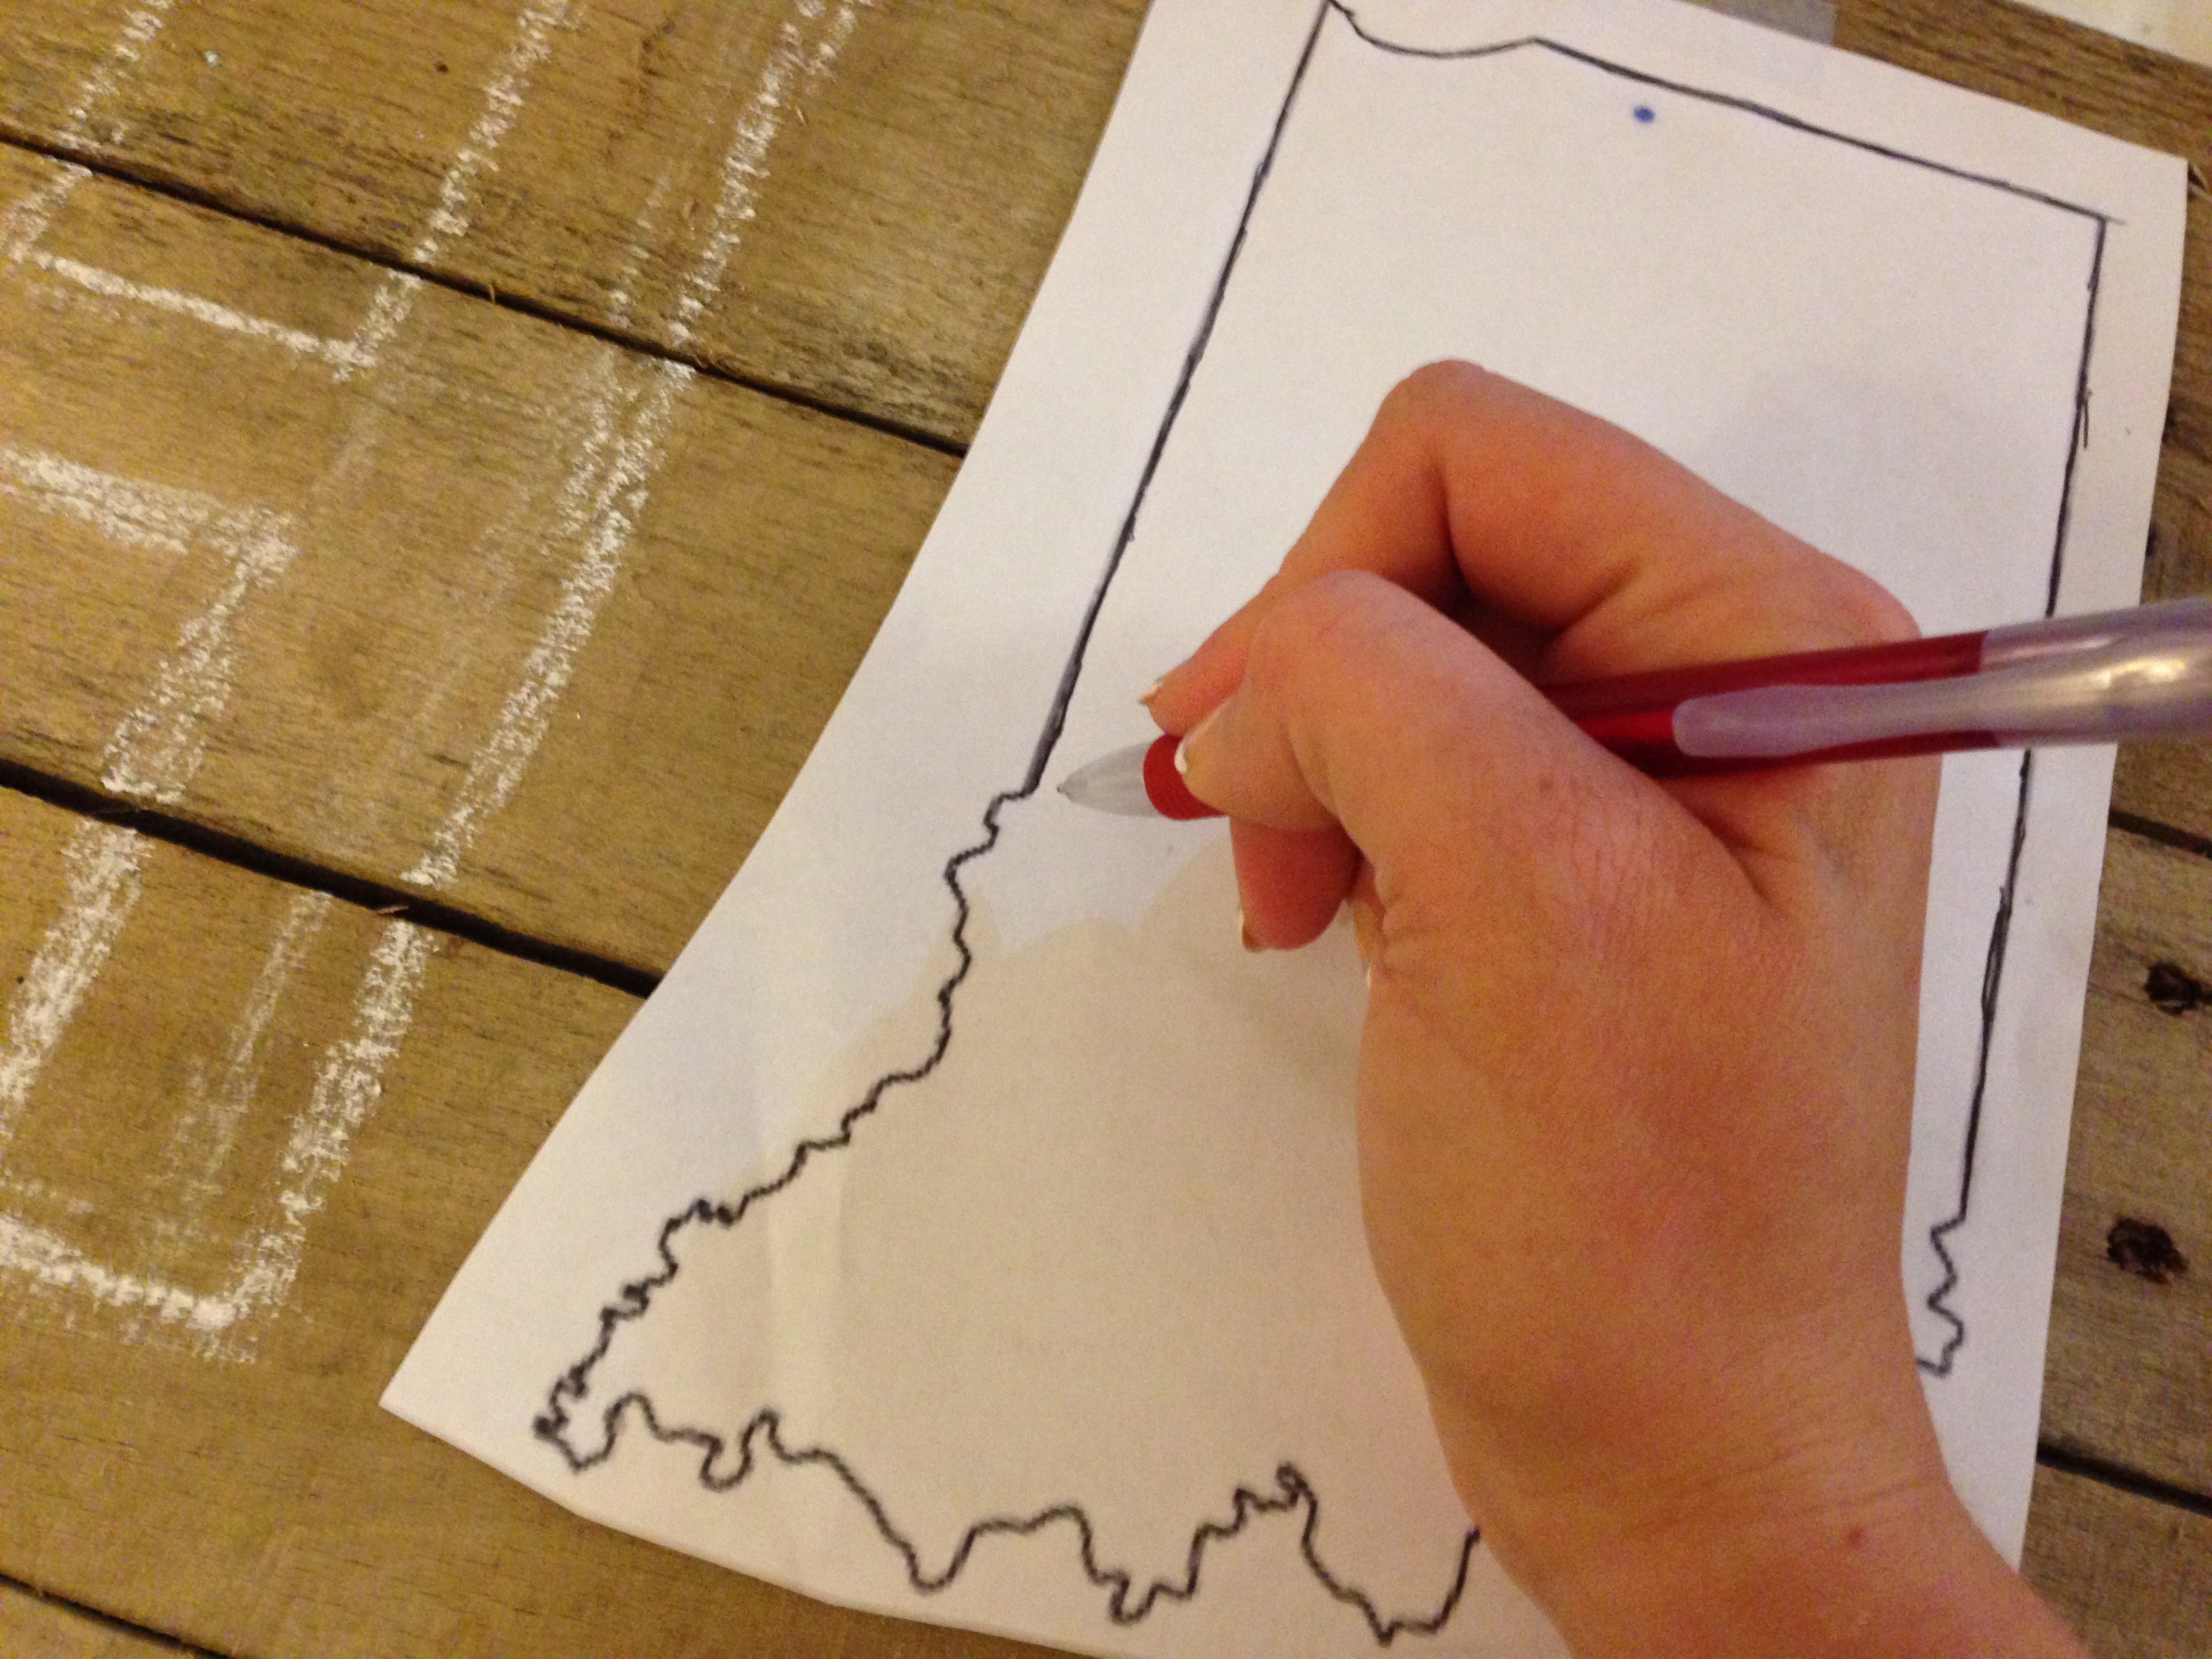
I chose a font online and printed out the words from the song in the size that I wanted. I did the same with the outline of Indiana.

IMG_3561

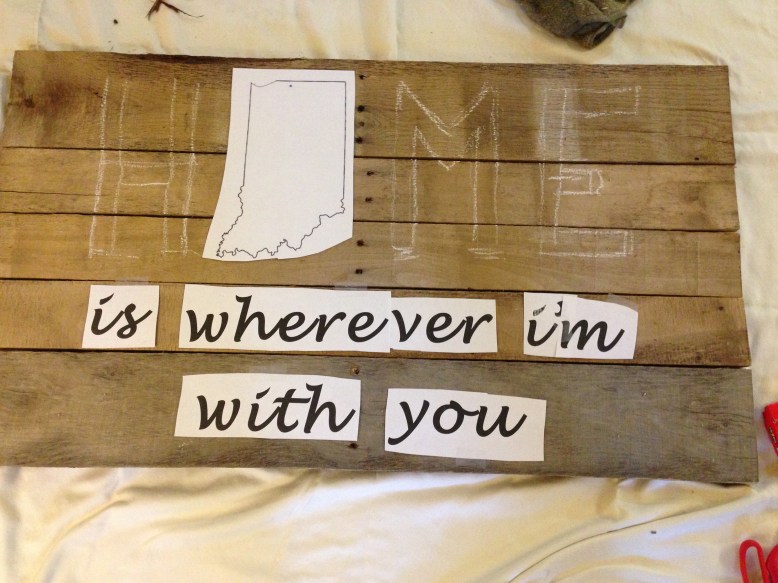
As much as I dislike my own handwriting, I freehanded the H, M, and E because there is something beautiful about not having perfection in a work of art.

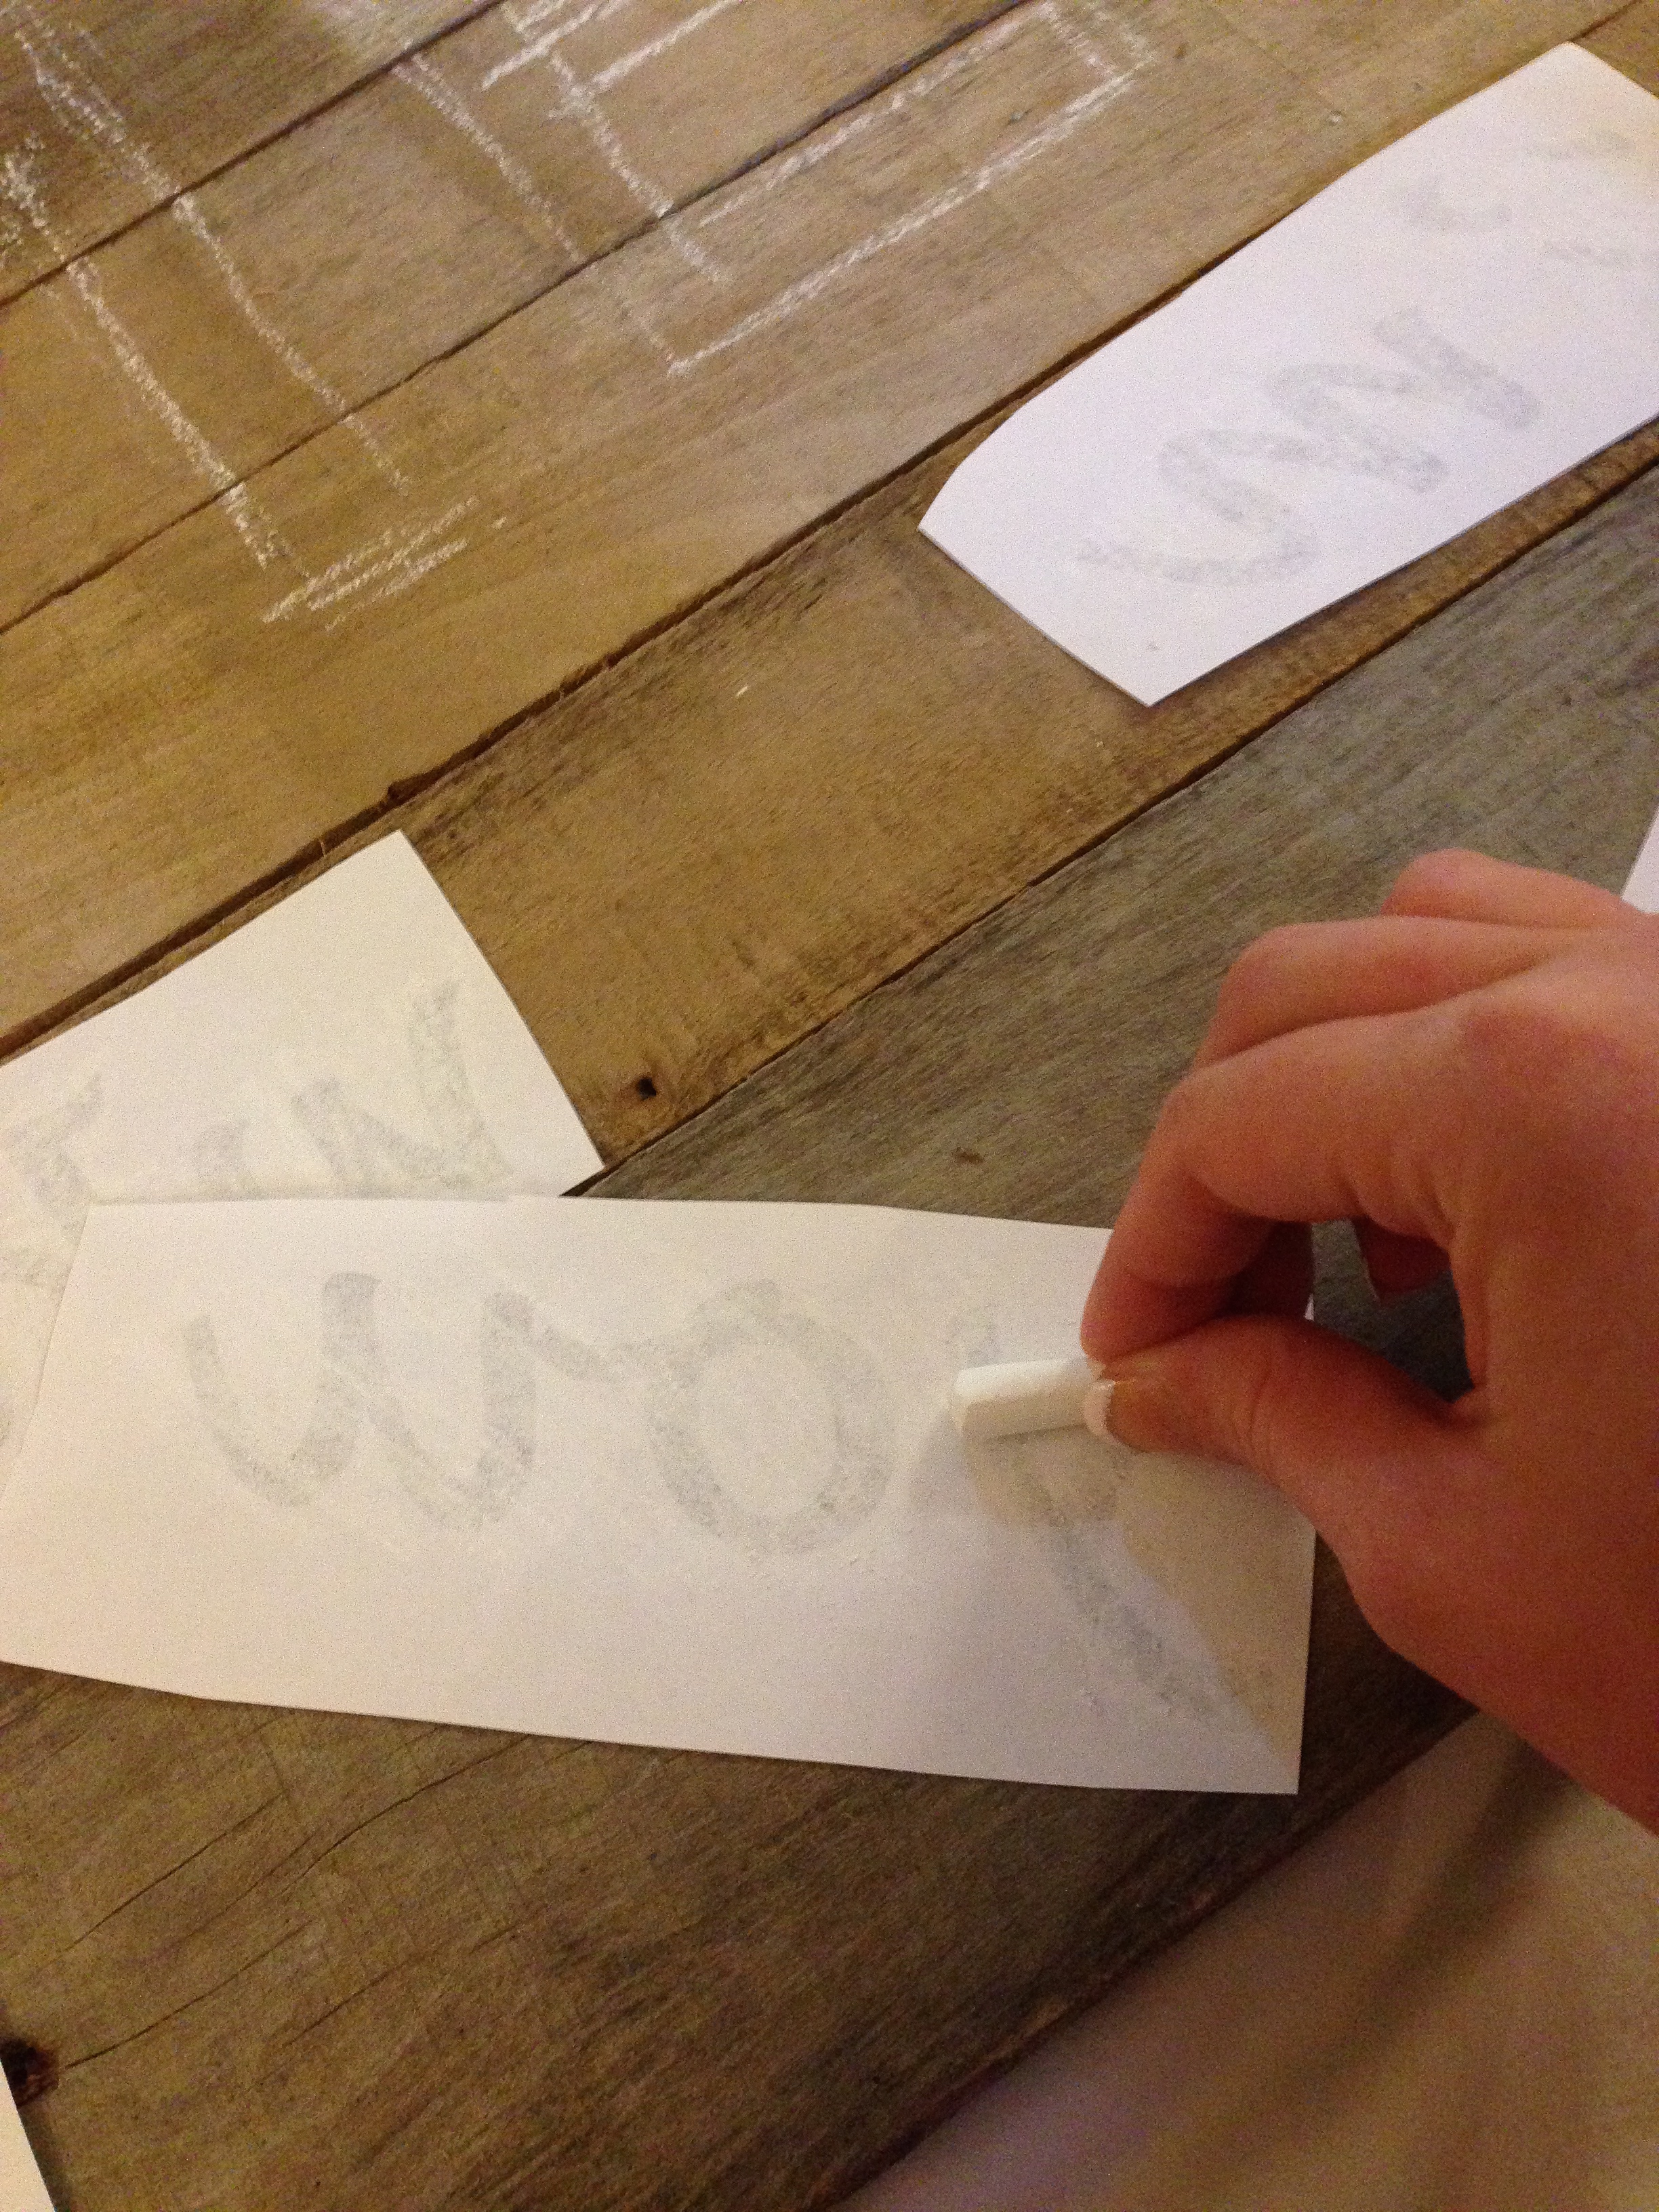
I colored the back side of the printouts with white chalk. I then arranged the print outs on the sign face up where I wanted them. Using a pen I traced the words and the outline of Indiana. Doing this will transfer a chalk line onto the wood.

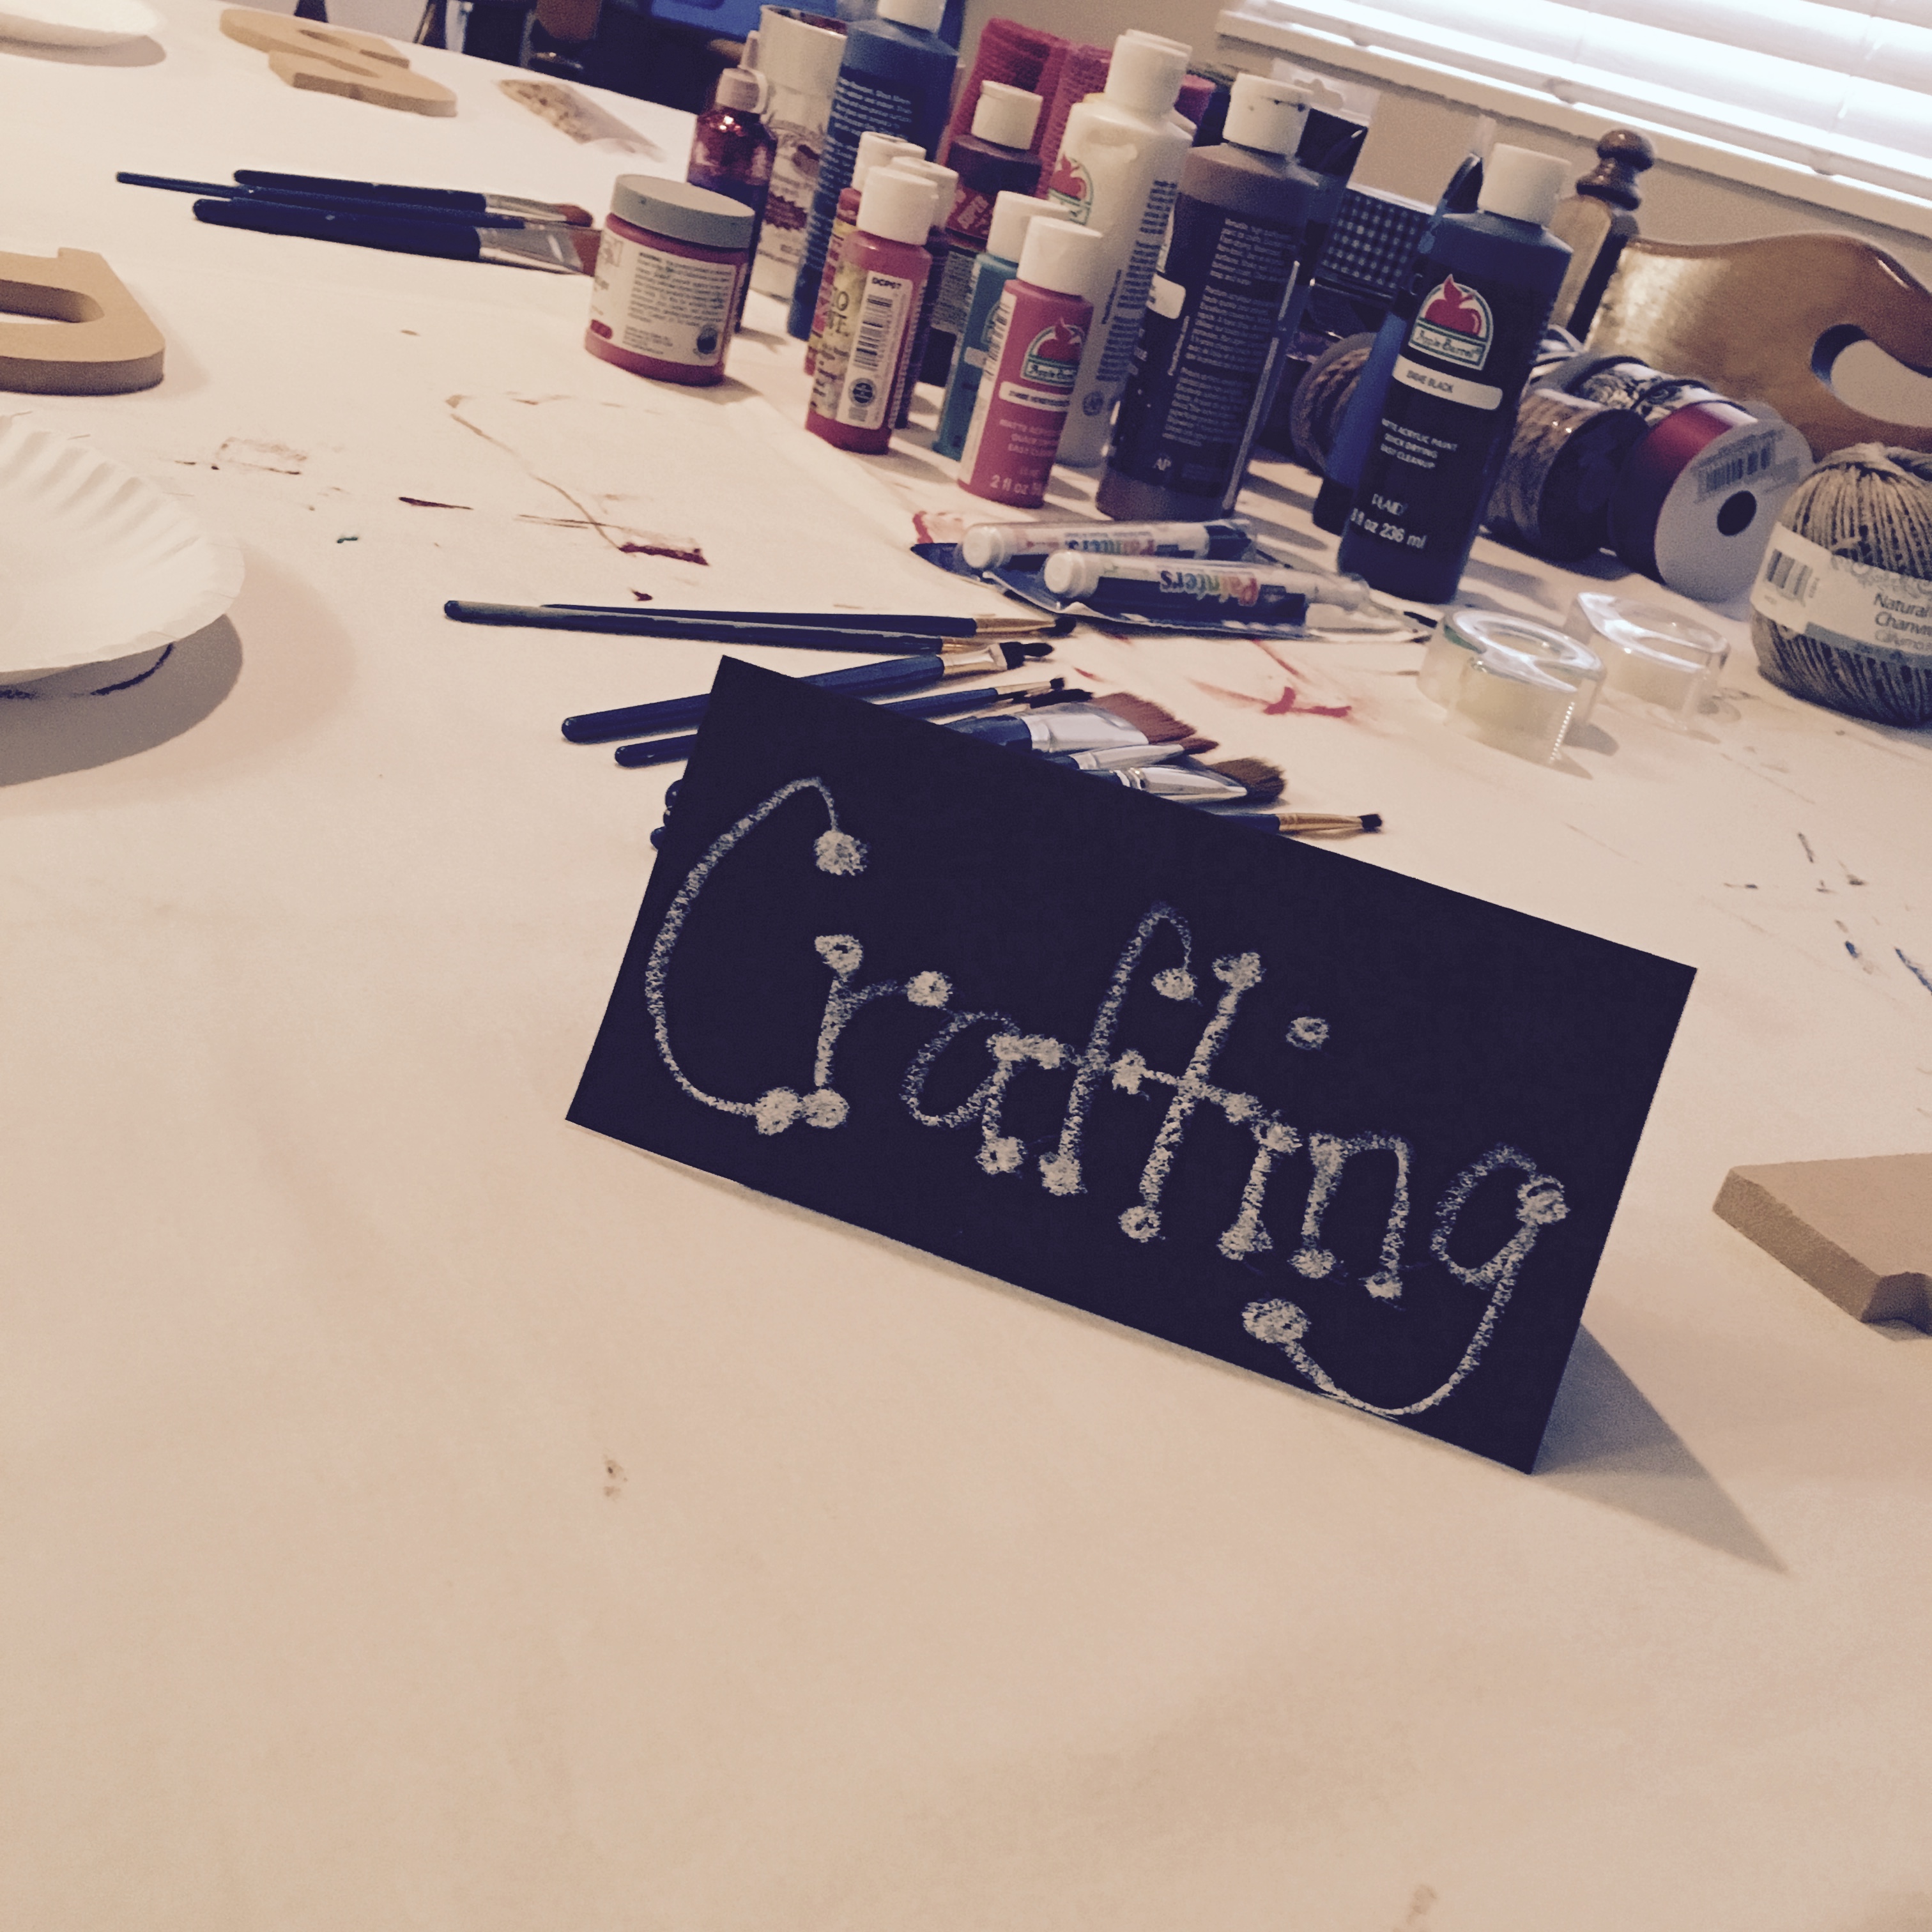
Once the outline was there, I simply painted the sign using black acrylic paint.

Erasing the chalk outline was easy with just a wet paper towel. Then I called on my husband to drill holes and hang it on the wall. We had to use heavy duty hanging equipment because that thing is very heavy and we didn’t want it falling on to anyone’s head while they are sitting on our couch.